- product
- TL Camera Control system
- product use
- Started Guide Extended settings Video center
- Service Support
- After-sale policy Sales network FAQ Download
- Contact us
- Contact information Message
Introduction: Why Use a Time Lapse Camera Outdoors?
Understanding Time Lapse Photography
Choosing the Right Time Lapse Camera for Outdoor Use
Step-by-Step Guide to Setting Up a Time Lapse Camera Outdoors
1. Choose a Location
2. Set Up Power Supply
3. Mounting the Camera
4. Adjust Camera Settings
5. Monitor and Maintain the Camera
Tips for Getting the Best Results from Your Time Lapse Camera
Common FAQs About Time Lapse Cameras
Conclusion: Capturing Stunning Outdoor Time Lapses
Time lapse photography is a powerful technique that allows you to condense long periods of time into a few minutes or seconds of video, showing processes and events that would normally take much longer. When applied to outdoor settings, time lapse cameras can capture everything from sunrises and sunsets, blooming flowers, cloud movement, and urban development to the construction of a building or the changing seasons.
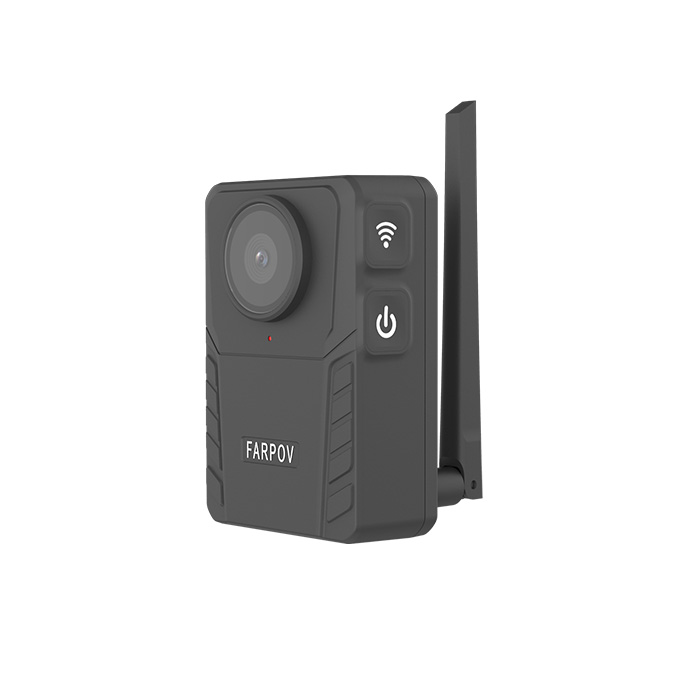
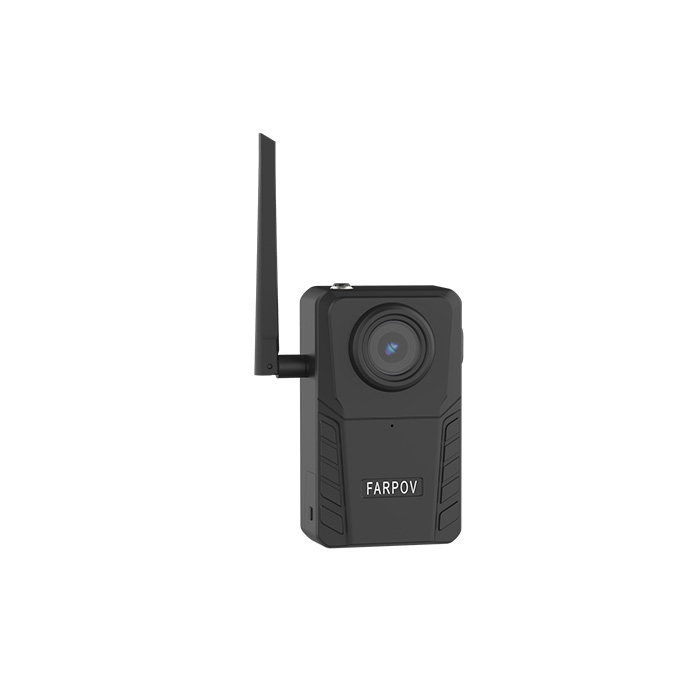
Outdoor time lapse photography offers endless possibilities, especially for professionals involved in nature, construction, or event documentation. Setting up a time lapse camera correctly ensures that you get clear, stable, and consistent footage, even under harsh environmental conditions. In this article, we will explore how to set up a time lapse camera for outdoor use, using the Farpov Pro Time Lapse Camera as an example.

Time lapse photography involves taking a series of photographs over a long period and then playing them back at a high speed. This creates the effect of compressing time, allowing slow or imperceptible changes, like the movement of the sun, to be shown quickly.
To set up a time lapse camera, you need:
A camera capable of shooting at set intervals.
A sturdy mount to keep the camera in place for extended periods.
Power to keep the camera running, often requiring solar panels or external batteries.
Captures Long-Term Changes: Perfect for documenting slow processes, such as plant growth or construction progress.
Easily Understandable: Shows long-term changes in a visually appealing way.
Requires Minimal Monitoring: Once set up, it often runs unattended for extended periods.
Now that you understand the basic concept of time lapse photography, let's dive into setting up your outdoor camera.
When setting up a time lapse camera outdoors, it's essential to choose the right device for your needs. A camera like the Farpov Pro Time Lapse Camera is an excellent option due to its advanced features and ability to operate outdoors year-round.

4K Resolution: Captures high-quality, detailed images.
Remote Control: By inserting a SIM card, the camera connects to a 4G network, allowing you to remotely control the camera, check its status, and adjust settings.
Low Power Consumption: Equipped with an excellent RTC power management system, it uses minimal power.
Solar Panel Compatibility: Pair it with a 10W solar panel to ensure continuous operation outdoors.
Connectivity: The camera supports Wi-Fi, 4G, and Bluetooth, giving you various options to connect and control the camera remotely.
Resolution: Look for a camera with high resolution for clear, sharp images.
Battery Life: Ensure the camera can operate for long periods without frequent recharging.
Weatherproofing: Make sure the camera can handle outdoor conditions, including rain, wind, and varying temperatures.
Connectivity: Remote monitoring and control are crucial for adjusting settings and reviewing footage.
Setting up a time lapse camera for outdoor use involves careful planning and a few key steps to ensure optimal performance. Here's a step-by-step guide using the Farpov Pro Time Lapse Camera as an example:
Selecting the right location is critical for getting a good time lapse shot. Consider the following when choosing your spot:
Lighting: Ensure the location receives adequate sunlight or is in a well-lit area if you're capturing daytime events.
Stability: Avoid locations that may be disturbed by wind, rain, or human interference.
Viewpoint: Think about the subject you want to capture. Whether it's a construction site, a landscape, or a flower garden, make sure the camera has a clear and uninterrupted view.
Accessibility: You may need to access the camera later to retrieve images or adjust settings, so ensure it's easily accessible.
Since time lapse cameras are typically left running for extended periods, a reliable power source is essential. The Farpov Pro Time Lapse Camera comes with an efficient RTC power management system, but pairing it with a 10W solar panel ensures continuous operation without worrying about battery life.
Steps for Setting Up Power:
Connect the solar panel: Attach the solar panel to the camera, ensuring it's positioned to get maximum sunlight exposure.
Check battery levels: Make sure the camera is fully charged before setting it up. If using external batteries, ensure they’re adequately charged as well.
Test the power setup: Before leaving the camera unattended, test the power supply to ensure the camera runs for the desired period.
To ensure stability and clear footage, the camera must be mounted securely.
Use a sturdy mount: The Farpov Pro camera is compact (150x70x120mm) and weighs 470g, so it requires a mount that keeps it steady. Use a tripod, pole mount, or another stable base.
Adjust the angle: Position the camera to capture the desired scene and adjust the tilt and angle to get the perfect shot.
Secure the camera: Make sure the camera is firmly attached to prevent it from shifting due to wind or external factors.
Now that your camera is mounted and powered, it's time to adjust the settings. The Farpov Pro Time Lapse Camera offers remote control via Wi-Fi, 4G, or Bluetooth, making it easy to change settings from a distance.
Adjust the following settings:
Interval: Set how often the camera will take a picture. The interval can range from seconds to minutes, depending on the speed of the event you’re capturing.
Resolution: Choose a high resolution, like 4K, to ensure the quality of your time lapse footage.
Exposure: Set the exposure to ensure the footage isn’t too dark or too bright.
Remote Access: Use the Farpov app to monitor the camera and adjust settings remotely.
Once the camera is set up, it’s important to monitor its status and ensure it’s functioning as expected.
Regular checks: Use the Farpov app to check the camera's status, battery levels, and captured images.
Maintenance: Ensure the lens is clean and free from obstructions like dirt or rain. If you're using a solar panel, make sure it’s not covered by debris.
To maximize the quality of your time lapse footage, consider the following tips:
Choose the right time of day: Capture footage during the golden hours of sunrise or sunset for the best lighting conditions.
Stabilize the camera: Ensure the camera is firmly mounted to avoid any unwanted movement.
Avoid rapid motion: If the subject is moving too fast, such as traffic or storm clouds, it may not create the desired effect in the time lapse.
Use weatherproofing: If the camera isn’t inherently weatherproof, use a protective housing to shield it from the elements.
The ideal interval depends on the speed of the event you're capturing. For fast events like city traffic, use a short interval (e.g., every 1 second). For slower events like plant growth, longer intervals (e.g., every 5-10 minutes) work best.
Yes, with the Farpov Pro Time Lapse Camera, you can monitor the camera’s status and adjust settings remotely through the app, using Wi-Fi, 4G, or Bluetooth connectivity.
Pair your time lapse camera with a solar panel, like the 10W solar panel for the Farpov Pro, to ensure a constant power supply, even for long
-term outdoor use.
Setting up a time lapse camera for outdoor use requires careful planning and the right equipment, but with the right setup, you can create stunning visuals that capture the passage of time in ways that static images can’t. With the Farpov Pro Time Lapse Camera, you can benefit from high-quality 4K resolution, low power consumption, and remote control features, making it an ideal solution for capturing outdoor time lapses.
Whether you’re documenting the changing seasons, the growth of plants, or the progress of a construction project, following the steps outlined in this guide will ensure you get clear, professional results.